Post updated on July 8, 2025
Making fun and easy crafts for holidays is one of my favorite things to do. This DIY painted wooden cross craft for Easter is no exception.
My kids and I worked on these crosses together and gave them as gifts to our friends, family, and neighbors. They are very easy to make and have a magnet on the back.
The Inspiration for this Painted Cross Magnet
Easter is one of my favorite holidays. Besides the main significance of the day, I love that Easter is during my favorite season – spring – and it occasionally falls on my birthday.
The inspiration for this painted cross magnet came from the most perfect Easter Sunday I can remember from my childhood. The sky was a beautiful shade of “sky blue.”
The sun was shining and the minimal amount of clouds I could see were “wispy” and light.
So, as you work on this project, please picture each color being part of something that happened and, depending on where you live, may still happen. The weather in Chicago is quite unpredictable during this time of year.
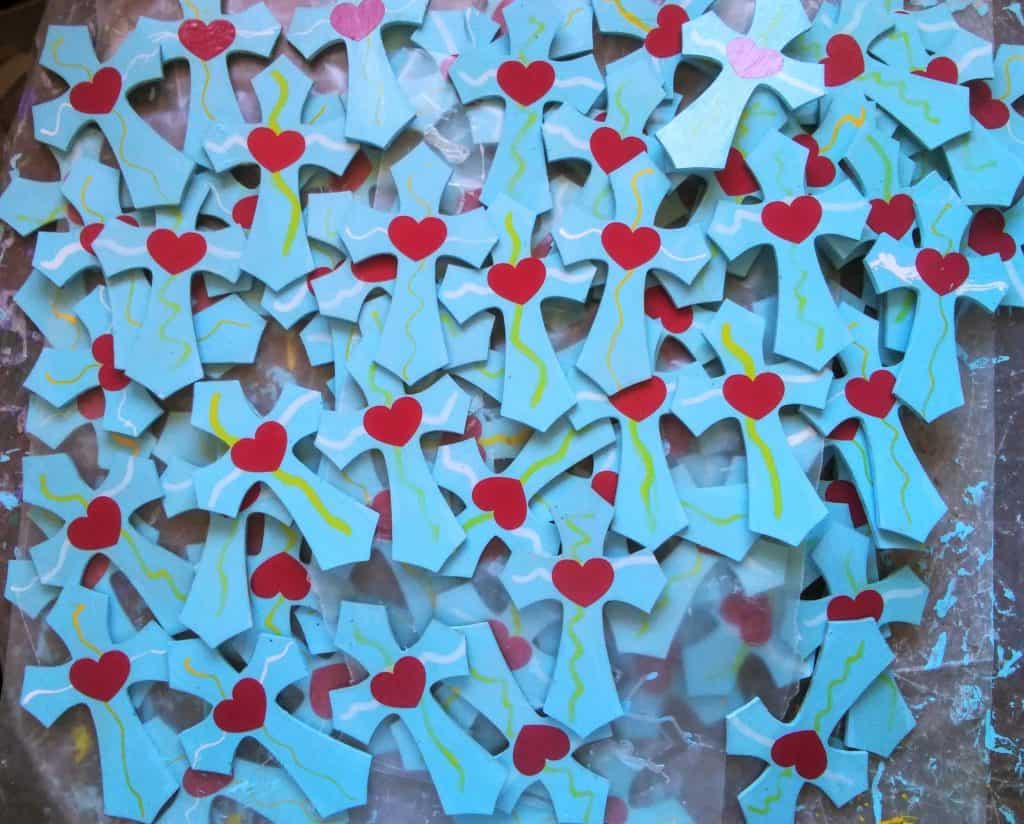
The cross painted blue represents the sky. The yellow line is the sun and the white line represents the clouds.
The red heart in the middle connects it all together with love.
The magnet is technically optional. I added it because I hoped the gift recipients would display it somewhere they would see it often – like a refrigerator – and think of me and/or my kids.
This post contains affiliate links. As an Amazon Associate, I earn from qualifying purchases.
How to Make Cross Craft for Easter
The supplies are easy to find and affordable. The step-by-step instructions are simple enough that a young child can follow along with an adult’s help.
As I mentioned above, my kids and I made these together. We sort of formed an assembly line with each person completing one of the steps.
Supplies Needed
- small wooden crosses – “blanks” for craft projects
- acrylic paint
- small paint brushes or 1″ foam brushes
- paint markers
- mod podge: glossy finish or matte finish, choose the one you prefer.
- red vinyl for the hearts OR small red heart stickers
- magnet dots
- scissors and glue (only if you are using paper for the hearts)
- wet wipes or wet paper towel for easy cleanup.
Instructions
- Make sure you have plenty of space to work on these. We painted and decorated 50 wooden crosses for this project.
- Paint the front side of the crosses a sky blue color with the acrylic paint. Let dry. We did not paint the back side to save time. You can absolutely paint the back – if you prefer.
- Use the white paint pen or marker to draw a squiggly line from left to right.
- Use the yellow paint pen or marker to draw a squiggly line from top to bottom.
- For the heart in the center, I used my Cricut Explore Air 2 to cut the hearts out of red vinyl. If you don’t have this machine, no worries! You can either buy small red stickers to fit or make them yourself from cardstock paper and use glue or the mod podge to put them on.
- Use the mod podge to seal everything in place and let dry.
- Add a magnet dot to the back of the cross.
You May Also Like
- This post has 10 easy crafts for kids of all ages.
- Try this easy painting project if you’re celebrating someone who is O-Fish-Ally a Teenager.
- These three printables for Easter are easy and fun activities to do with your kids.
- This cupcake cake in the shape of a cross is a unique idea for a holiday dessert.
What Do You Love About Easter or Spring?
We would love to hear from you! If you don’t celebrate Easter but love spring, please share a favorite memory or family tradition.
Awesome